OnOff Tiles Installation
With your first order, you’ll receive these freebies:
- Bubble Level
- Felt Squeegee
Everything you need to get it straight and smooth on the first try.
BaseTile Installation

STEP 1
Level
Place the bubble level where you want the top of your artwork to be. Make sure the bubble is centered.

STEP 2
Peel
Peel the release paper from the back of the BaseTile.
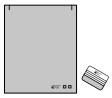
STEP 3
Stick
Make sure the BaseTile is facing up and lined up with the level, then press it firmly onto the wall with the squeegee.
ArtTiles / PhotoTiles
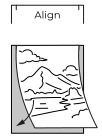
STEP 4
Style
Center your ArtTile or PhotoTile between the top guide marks, then attach it to the BaseTile.
Tip: Start from the top.
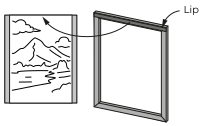
STEP 5
Frame
If you purchased an OnOff Frame, hook the top lip onto the BaseTile first, then press the frame into place.
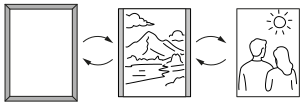
STEP 6
Swap
Lift off the frame, remove the current ArtTile or PhotoTile, and swap in something new whenever you want.